Shop Now
- Copic
-
Painting
- Paint
-
Inks
- Atelier Acrylic Inks
- Sakura Oil Printing Colours
-
Permaset Screenprinting Ink
-
Permaset Aqua Standard
- Permaset Aqua Standard 100ml
- Permaset Aqua Metallic 100ml
- Permaset Aqua Standard 300ml
- Permaset Aqua Glow 300ml
- Permaset Aqua Metallic 300ml
- Permaset Aqua Standard 1Lt
- Permaset Aqua Process Colours 1Lt
- Permaset Aqua Glow 1Lt
- Permaset Aqua Metallic 1Lt
- Permaset Aqua Standard 4Lt
- Permaset Aqua Process Colours 4Lt
- Permaset Aqua Glow 4Lt
- Permaset Aqua Metallic 4Lt
- Permaprint Premium
- Permaset Aqua Supercover
- Screenprinting Sets
- Print Paste
- Screenprinting Accessories
-
Permaset Aqua Standard
- Amsterdam Acrylic Inks
- Mediums
- Canvas and Surfaces
- Brushes and Tools
-
Drawing
- Markers
- Pens
- Pencils
- Pastels
- Inks
- Drawing Surfaces
- Accessories
- Surfaces
- MABEF Easels
- Craft & Cutting
- Adhesives & Tape
- Display & Storage
- Framing Supplies
- Monumental Masons
- Talens
- Tutorials
- X-Press It
- Acrylic Paint
- Acrylic Pouring
- Art
- Art Creations
- Australian Artist
- Blending
- Chroma
- Cobra Water Mixable Oil Colours
- Colour Mixing
- Copic
- Deco Tape
- Double Sided Tape
- Drawing
- Ecoline
- Fineliners
- Gel Pens
- Gelly Roll
- Hand Lettering
- Koi Watercolours
- Lightfastness
- Mixed Media
- Oil Painting
- Oil Pastels
- Paint Markers
- Painting
- Pastels
- Pencils
- Permanent Markers
- Pigma Micron
- Pouring Art
- Rembrandt
- Sakura
- Soft Pastels
- Solvent Free Oil Painting
- Step By Step Tutorials
- Storage
- Talens
- Tips & Techniques
- Van Gogh
- Watercolour Brush Pens
- Watercolours
- X-Press It Craft
- Metal Leaf
- Glue
- Adhesives
- Alcohol Markers
- Copic Sketch
- Copic Classic
- Copic Ciao
- Copic Ink
- Airbrushing
- Refillable
- Alcohol Ink Art Techniques
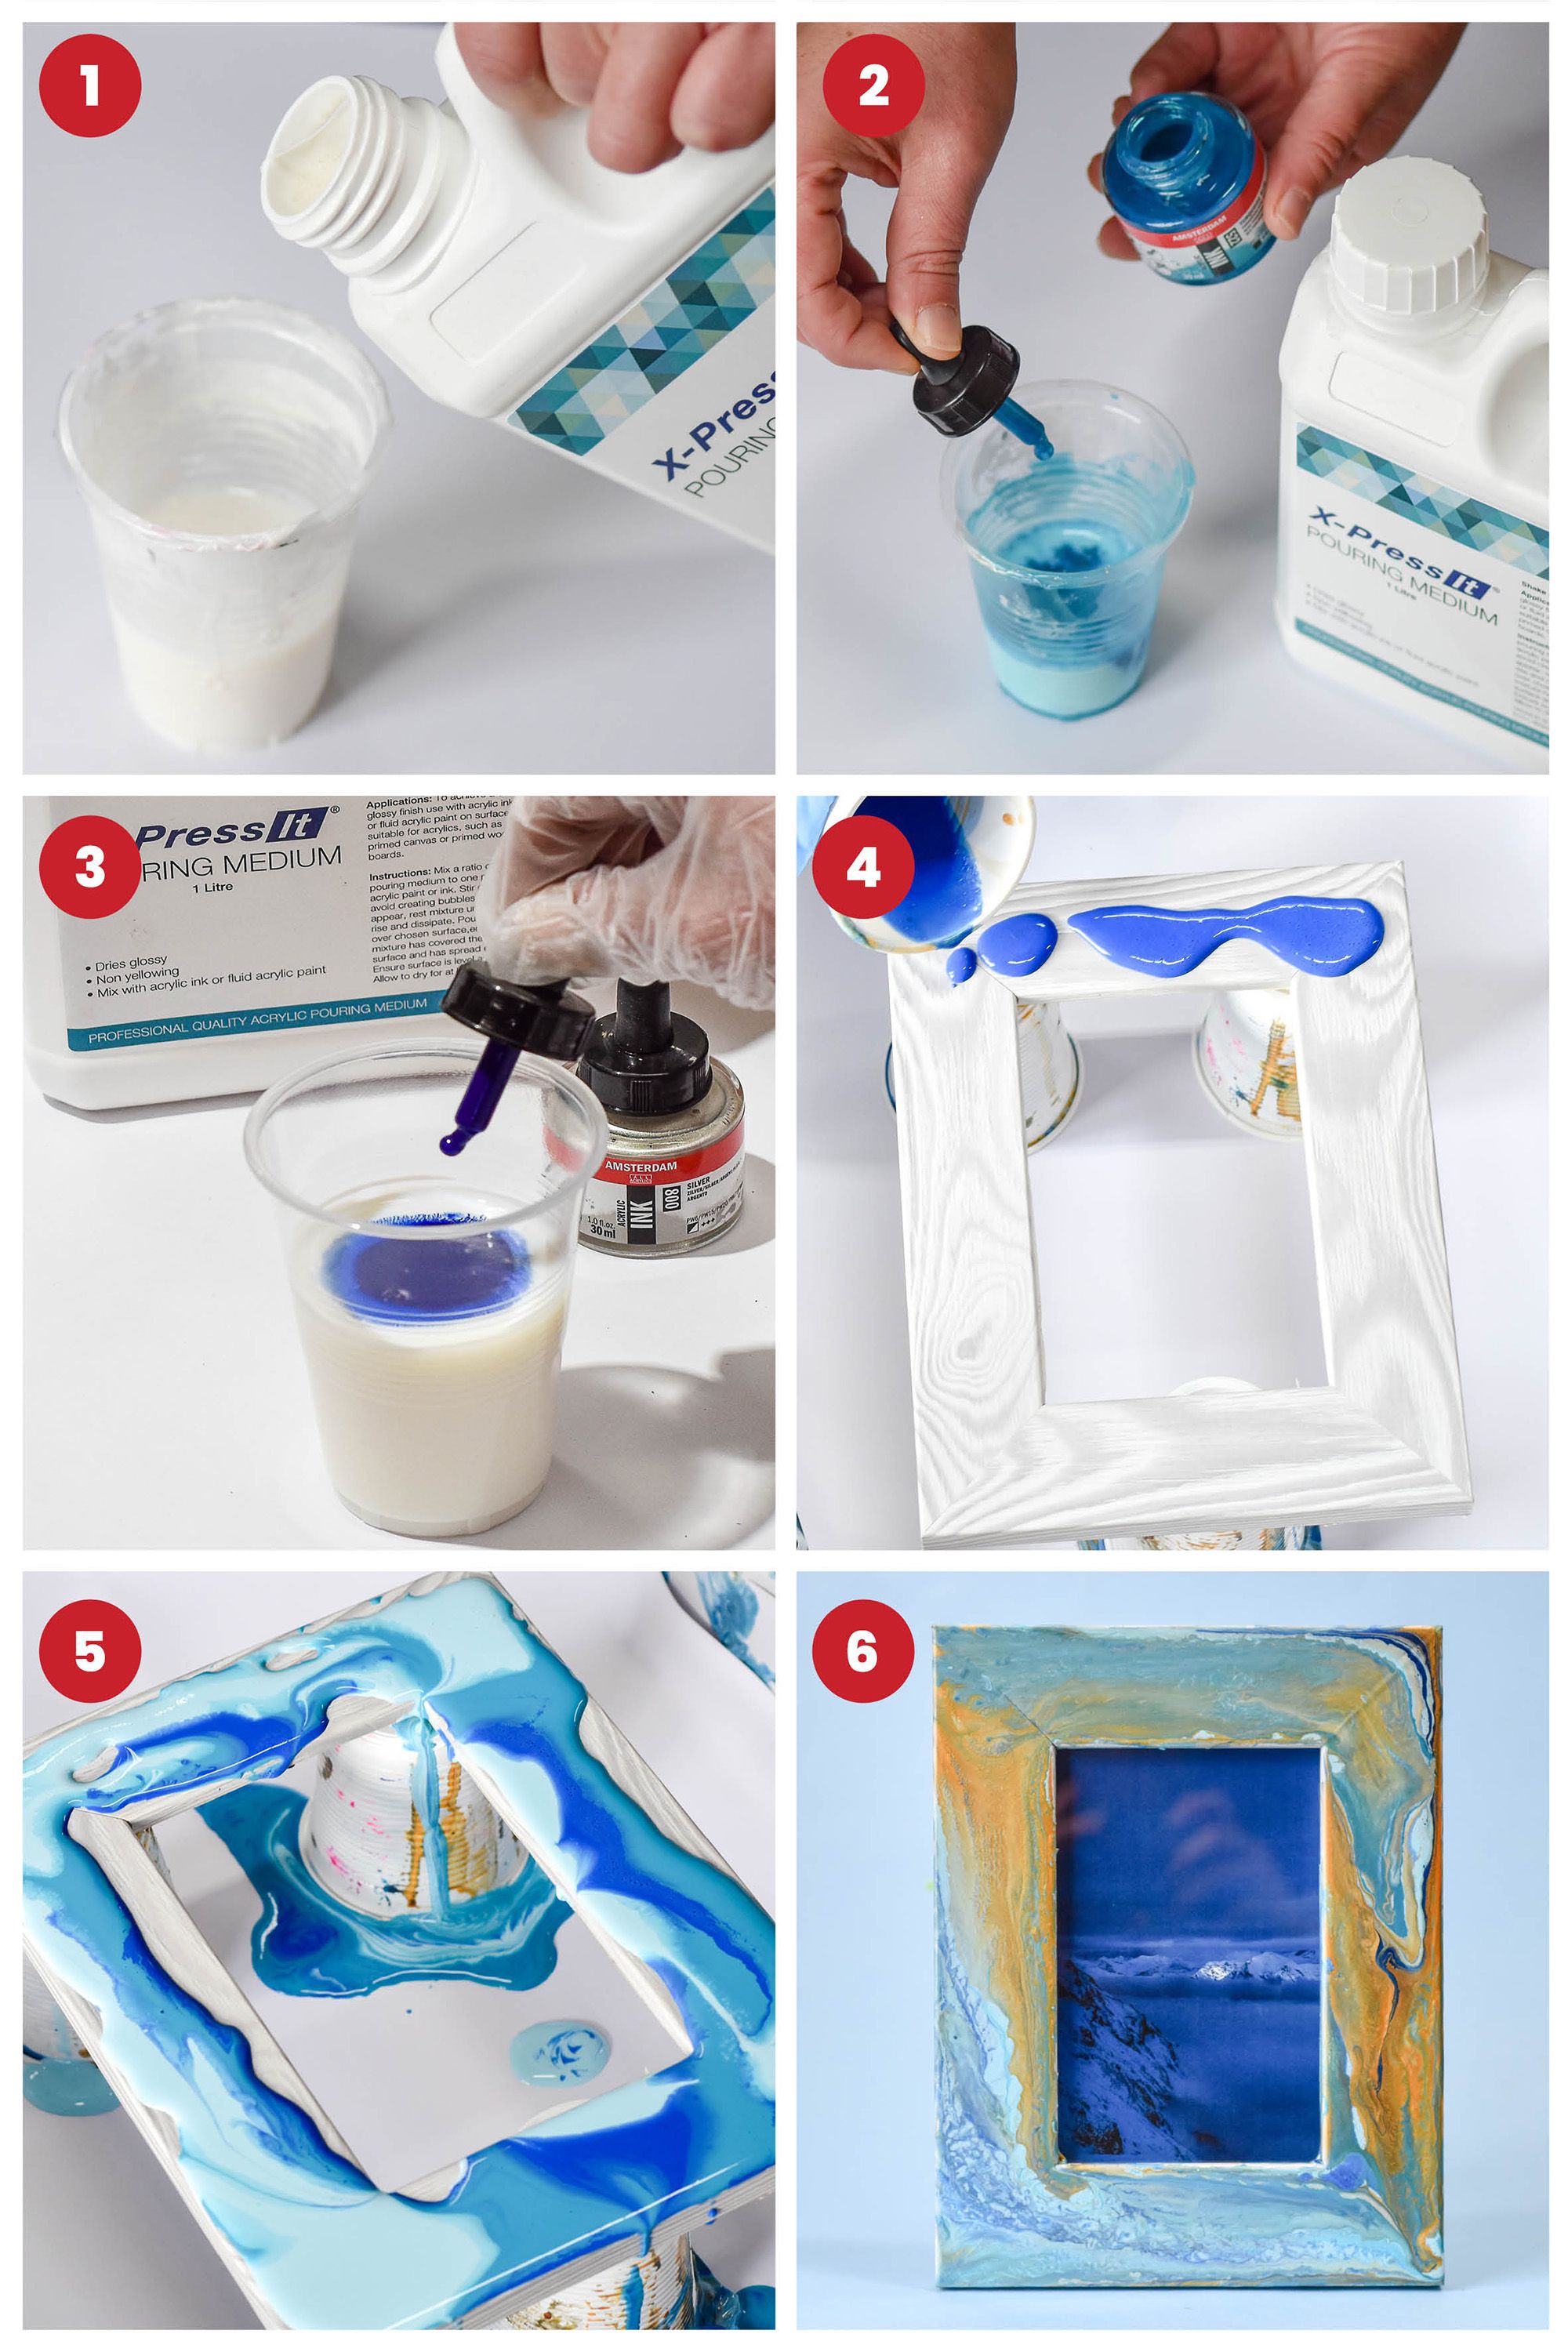
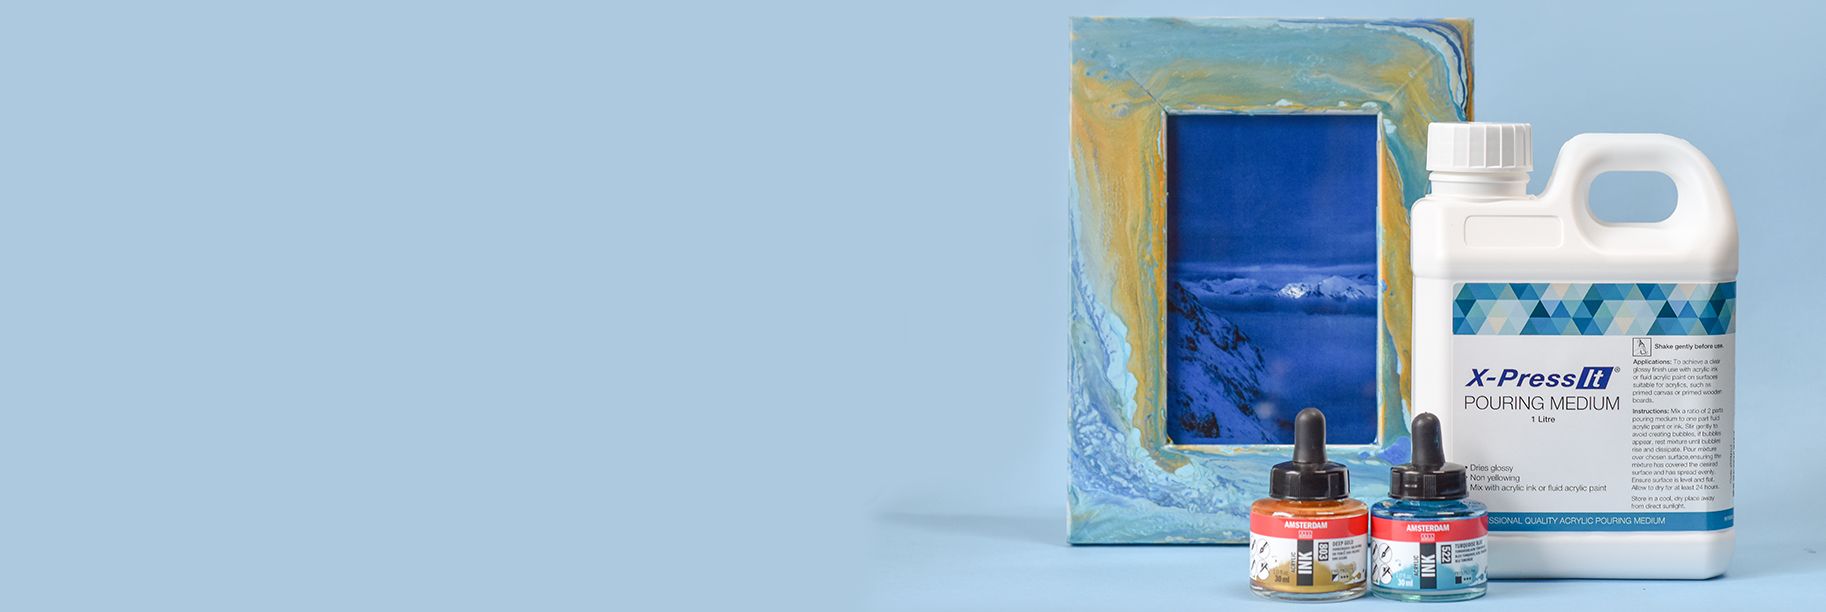
Acrylic pouring photo frame
What you will need:
- X-Press It Pouring Medium (available in 250ml and 1lt)
- Wooden frame
- Amsterdam Acrylic Ink
- Rubber Gloves
- Mixing Cups
Place a protective surface under the canvas to catch the pouring medium running off the edges. We used a plastic bag. Lay canvas flat and elevate it from the protective surface.
Step 1: Pour approximately 50ml of pouring medium into each of your cups.
Step 2: Add approximately two squirts of acrylic ink to the pouring medium. Mix well and leave cups to settle so that bubbles rise to the surface. Make sure all ink is dissolved into the pouring medium. Repeat with each desired colour.
Step 3: In a new cup carefully pour each colour. Allow the cup to settle allowing any bubbles to rise to the surface.
Step 4: Pour the mixed cup of colours onto your photo frame piece. Make sure you are not pouring too close to the edge of the wood.
Step 5: Move the frame around to ensure all the wood is covered. The colours may appear cloudy initially but should dry bright and vibrant.
Step 6: Ensure the surface is level and flat. Let dry for at least 24 to 48 hours. Once dry place a photo in your frame and put it on display.